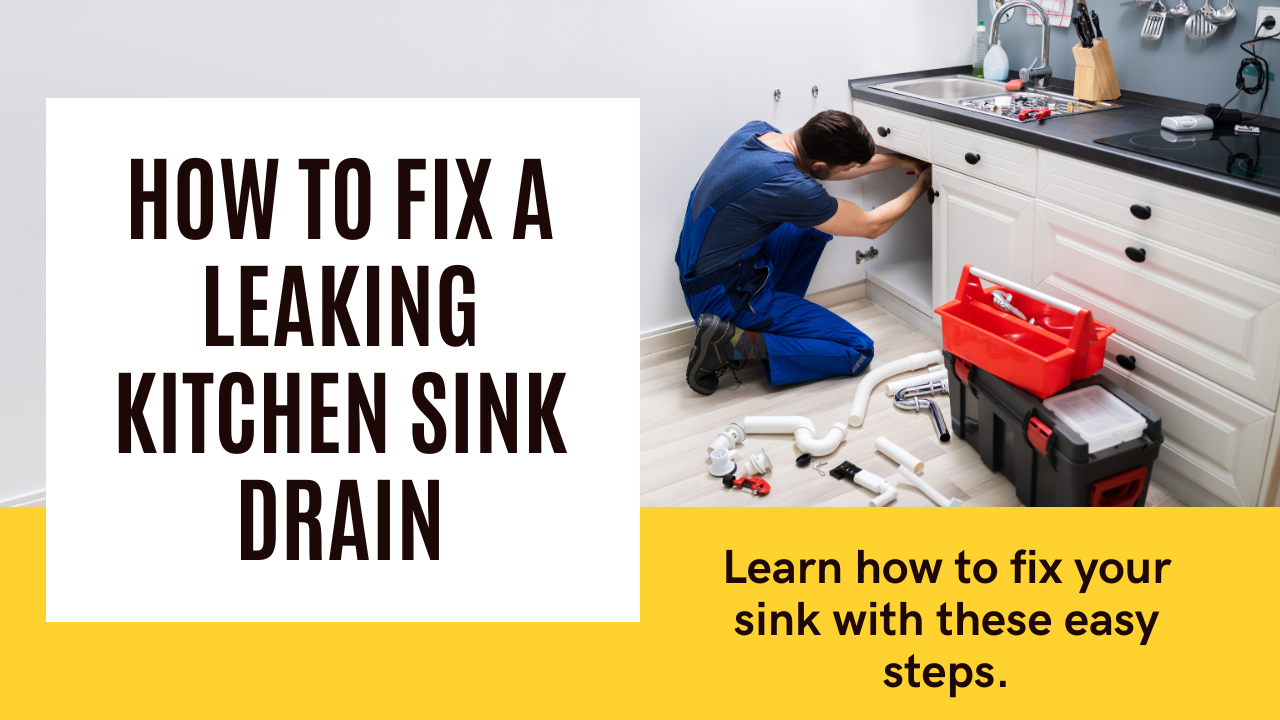
8 Ways for How to Fix Leaking Kitchen Sink Drain
Discovering a leak or damage in your sink’s drain can be quite inconvenient. Typically, a leak indicates loose, damaged, or worn-out pipes. Fortunately, you can easily address these issues at home with a few supplies. If the leak is originating from the pipes, it could be due to loose connections or damage. On the other hand, if the leak is at the base of your sink, the sink strainer might be the cause. We’ll begin with some swift and temporary solutions to promptly stop the leak, and then explore more permanent fixes based on the location of the issue.
- There are five effective methods for addressing a leaking kitchen sink, with common repairs focusing on the faucet, spray hose, sink strainer, as well as potential fixes for the hot and cold water supply lines or the sink drain pipe.
- Water from a leak in the kitchen sink can permeate cabinets, walls, and flooring. This moisture-rich environment fosters mold growth within the drywall. Structural water damage of this nature necessitates attention from restoration professionals.
- To avert leaks in the kitchen sink, it is advisable to regularly inspect the condition of sink components and pipes. Installing a leak detector beneath the sink serves as a proactive measure, reducing the likelihood of water damage in the kitchen.
Recognizing When to Seek Assistance from Water Damage Professionals
Successfully addressing a leak through DIY efforts is gratifying, especially when you can manage the cleanup of water damage caused by a leaky kitchen sink.
However, there are circumstances that warrant the expertise of water damage professionals, such as those at ServiceMaster of Lake Shore. Here are a few reasons why engaging our restoration pros might be necessary:
- The leak has caused damage to sink cabinet walls and doors.
- Flooring around the sink starts to peel or buckle.
- Drywall beneath the sink exhibits stains or crumbles.
- Persistent mold growth persists despite cleaning efforts.
- An unpleasant musty odor pervades the kitchen.
In such situations, seeking the assistance of restoration professionals can ensure a thorough and effective resolution to the water damage issue.
Essential Tools and Materials for Sink Repair

Before embarking on any repair, it’s crucial to gather the necessary tools and materials to ensure a smooth and efficient fixing process. Here’s a comprehensive list of what you might need:
Basic Tools:
- Adjustable Wrench: Essential for tightening and loosening nuts and bolts; choose one that can adapt to different sizes.
- Pliers: Useful for gripping small objects and removing old parts such as seals or O-rings.
- Screwdriver: A standard flat-head screwdriver can be handy for loosening screws on clamps or other fittings.
- Pipe Wrench: Provides leverage for tightening or loosening larger fittings in more extensive plumbing tasks.
- Bucket: Keep a bucket nearby to catch any water that may spill during disassembly.
- Towels or Rags: Essential for cleaning up spilled water and drying areas before beginning the repair.
Specialized Tools:
- Pipe Thread Sealant or Plumber’s Tape: Aids in creating water-tight seals on threaded pipe connections.
- Pipe Cutter: Useful for making clean cuts if you need to remove a section of damaged pipe.
- Teflon Tape: Helpful for sealing threaded joints and easier to disassemble than other sealants.
- Plunger: Useful for quickly resolving simple blockages that may cause leaks.
Materials:
- Replacement Seals and O-rings: Good to have in case existing ones are worn out or damaged.
- Rubber Gaskets: May need replacement over time to ensure a proper seal.
- PVC or Copper Pipes: Extra pipe material may be necessary if replacing a damaged section.
- Pipe Clamps or Hose Clamps: Used to temporarily secure loose connections until damaged parts can be replaced.
- Adhesive or Epoxy: Required for certain repairs to seal gaps or cracks.
Optional:
- Gloves: Protect your hands, especially when working with chemical sealants or cleaners.
- Flashlight: Enhances visibility when working under the sink.
- Safety Goggles: Safeguard your eyes from debris or splashing water.
Preventative Measures for Kitchen Sink Leaks
- Maintain cleanliness in the sink faucet, spout, and valve seat connections.
- Conduct monthly inspections of supply lines and drain connections.
- Install a leak detector beneath the sink, configuring it to send text alerts when needed.
- Stay vigilant for unusual odors or sounds in the vicinity of the sink.
- Avoid overcrowding the sink cabinet with items that can be stored elsewhere.
Preparation Before Starting the Repair
Prior to commencing work on the faucet or sprayer hose, it’s crucial to turn off the water supply lines beneath the sink. Alternatively, if working on other plumbing components, shut off the home’s main water supply.
Ensure you have a bucket, towels, and the following tools readily available:
- Adjustable Wrench
- Basin Wrench
- Screwdriver
- Plumber’s Putty
- Silicone Caulk
Also Read How to Fix ChatGPT High Demand Error

How to Resolve a Leaking Kitchen Sink

Addressing a kitchen sink leak involves specific steps based on the type of leak. Here, we’ll outline the appropriate solutions for different leak scenarios.
1. Leaky Hot and Cold Supply Lines
Problem: Persistent water dripping and pooling under the sink.
Solution: Resolve the issue of leaky hot and cold water supply lines with the following steps:
- Tighten the nuts connecting the hot and cold water supply lines to their respective cutoff valves. Inspect multiple connections on each line, depending on your kitchen sink’s plumbing configuration.
- If the supply lines are over five years old, consider replacement rather than attempting repairs.
2. Drain Seal Leaks:
- Identify a broken drain seal if your sink cannot retain water without leaking.
- Using pliers or a fork, gently remove the old drain seal.
- Apply new adhesive cautiously around the bare drain, ensuring not to overapply.
- Replace the seal, centering it around the drain.
- Drain seal leaks are common and easily fixable. Replacement parts are readily available at local hardware stores for less than $5. Ensure correct application to avoid future issues.
3. Leaking Spray Hose
Problem: Water leaks from either the spray head assembly or the hose.
Solution: Addressing a leaking spray hose involves specific steps:
- Using a small screwdriver, disconnect the spray head from its slide nut.
- Remove and replace the washer. If the spray head continues to leak, disassemble it once more and pry off its C-clip.
- Substitute the spray head with a new one if needed.
If the leak originates from the spray hose:
- Disconnect the existing hose.
- Replace it with a new hose, sliding it into place.
- Hand-tighten the hose to the faucet stem.
- Secure the connection using a wrench.
4. Drain Leaks:
- If the issue is not with the faucet or seal, check for drain leaks, where water escapes from the drain while the sink is emptying.
- Tighten the nut for the pipe as a simple fix.
- If tightening doesn’t resolve the issue:
- Confirm the use of Plumbers Putty during the installation of the drain outlet flange.
- Ensure the gasket/rubber sealing washer is entirely flat.
- If the sink continues to leak, disassemble the entire setup, inspect each part for cracks or damage, replace any faulty components, and then reinstall.
- If the sink still leaks after these steps, reevaluate to confirm if the leak is from the drain or another source.
5. Leaky Faucet
Problem: When the water is turned on, the sink faucet leaks around its base.
Solution: Resolving this type of leak involves several steps. Begin by addressing the O-ring that secures the faucet in place. Utilize a wrench to loosen the faucet coupling nut.
- Remove the faucet and tighten the exposed O-ring stem screw, or replace the O-ring disc if necessary.
- Dry the area surrounding the faucet base.
- Turn the water on to check for any remaining leaks.
If leakage persists, consider cleaning or replacing the valve seat connection situated between the spout and the faucet.

6. Faucet Leaks:
- Check the faucet first, as it’s often the primary source of leaks.
- Faucet leaks are easily identifiable as water flows down the back of the faucet, pooling behind the sink.
- In this case, replace the faucet to resolve the issue.
- Faucet leaks are straightforward to address, and replacement faucets are readily available for installation.
7. Leaks Around the Sink Strainer
Problem: Water leaks from the strainer assembly connected to the drain, causing water to seep into the cabinet beneath the sink.
Solution: Resolving leaks around the sink strainer involves the following steps:
- Initially, tighten the connection between the sink strainer and the strainer basket.
- If the leak persists, remove the strainer, clean off the old plumber’s putty, and apply a fresh layer. Reconnect the strainer.
- If the assembly continues to leak, consider replacing it with a new sink strainer and basket.
8. Leaking Sink Drain Pipe
Problem: Water drips from the drain pipe when emptying the sink.
Solution: Resolve this issue by following these steps:
- Begin repairs by tightening the pipe slip nuts, starting with the one nearest the sink.
- If the pipe continues to leak, consider sealing around the slip nuts with epoxy putty or silicone tape.
For stubborn leaks:
- Replace the rubber gaskets in the pipe. Loosen the first slip nut to access the gasket, replace it, and tighten the slip nut. Repeat this process for the remaining slip nut connections.
Power Tip: Keep a bucket and towels on hand while working on the drain pipe to manage any spills or drips effectively.
Conclusion
In conclusion, addressing leaks in a kitchen sink involves identifying the specific issue and applying targeted solutions. For a leaking faucet, inspect and tighten the O-ring or replace the worn-out parts. Leaky spray hoses can be fixed by replacing washers or spray heads. Strainer leaks may require tightening connections or reapplying plumber’s putty. Persistent drips from hot and cold supply lines call for tightening nuts or considering replacement. Leaking sink drain pipes can often be fixed by tightening slip nuts or, in stubborn cases, by replacing rubber gaskets.
While DIY repairs are often effective, it’s crucial to know when to seek professional help. Severe water damage, mold growth, or persistent leaks after attempted fixes may necessitate assistance from restoration professionals.
Remember to gather the necessary tools and materials before starting any repair, and always prioritize safety. Regular maintenance and proactive measures, such as using leak detectors, can help prevent future issues. Whether tightening connections, replacing parts, or applying sealants, addressing kitchen sink leaks promptly ensures a functional and water-tight kitchen environment.
FAQ’S for How to Fix Leaking Kitchen Sink Drain
1. How do I fix a leaky kitchen faucet?
Ans. Check the O-ring holding the faucet in place. Loosen the faucet coupling nut, remove the faucet, and tighten the exposed O-ring stem screw or replace the O-ring disc. If the leak persists, consider cleaning or replacing the valve seat connection between the spout and faucet.
2. What should I do if water is leaking from the spray hose?
Ans. Disconnect the spray head using a small screwdriver, replace the washer, and, if necessary, replace the spray head. If the leak is from the spray hose, disconnect and replace it. Slide the new hose in place, hand-tighten it to the faucet stem, and secure the connection with a wrench.
4. How can I stop leaks around the sink strainer?
Ans. Tighten the connection between the sink strainer and the strainer basket. If the leak persists, remove the strainer, clean off old plumber's putty, apply fresh putty, and reconnect. If issues persist, consider replacing the sink strainer and basket.
4. What should I do if there's a constant drip and pooling under the sink from hot and cold supply lines?
Ans. Tighten the nuts connecting the hot and cold water supply lines to their cutoff valves. If the lines are over five years old, replacement may be more effective than repairs. Always ensure the main water supply to your home is turned off before working on the sink supply lines.
5. How do I address a leak from the sink drain pipe?
Ans. Start by tightening the pipe slip nuts, beginning with the one nearest the sink. If the leak persists, consider sealing around the slip nuts with epoxy putty or silicone tape. Stubborn leaks may require replacing the pipe's rubber gaskets. Keep a bucket and towels handy while working on the drain pipe to manage any spills or drips effectively.


1 thought on “Best Ways for How to Fix Leaking Kitchen Sink Drain 2024”