How to Build Own AI Chatbot With ChatGPT API in Easy 2024

A Step-by-Step Tutorial for Develop Own AI Chatbot with ChatGPT API

Build Own AI Chatbot With ChatGPT API, In a groundbreaking development, OpenAI has unveiled the ChatGPT API to the public, including the introduction of the new “gpt-3.5-turbo” model. This powerful model, which also powers ChatGPT Plus, comes at a significantly reduced cost (10x cheaper) while maintaining exceptional responsiveness. This release opens up a realm of possibilities, allowing both developers and non-coders to harness the potential of the ChatGPT API and create their own AI chatbots.

In this tutorial, we’ll guide you through the process of building your personalized AI chatbot using the ChatGPT API. Additionally, we have incorporated a Gradio interface to facilitate easy demonstration of the AI model, making it simple for you to share your creation with friends and family. Without further ado, let’s dive into the steps of creating your customized AI using the ChatGPT API.

How does ChatGPT work?

ChatGPT, an innovative creation from OpenAI, stands as a chatbot language model. Specifically tailored for generating conversational text, ChatGPT belongs to the GPT-3 family, a series of language models renowned for their proficiency in natural language processing (NLP) tasks, encompassing text generation and question answering.

 Build Own AI Chatbot With ChatGPT API

Built on the foundation of the Generative Pre-trained Transformer (GPT) architecture, ChatGPT employs deep learning techniques to produce responses that closely mimic human conversation. Its training involves exposure to a vast corpus of text data, spanning books, articles, and websites. This comprehensive training equips ChatGPT with the ability to generate accurate and fluent responses across various prompts, including chatbot interactions, email content, and social media posts.

Also Read How to Use ChatGPT on WhatsApp

How to Create an Account on ChatGPT

To begin the process of accessing ChatGPT, the initial step is to register for an OpenAI account, assuming you haven’t done so already. Upon entering the platform, you will be directed back to the homepage.

Navigate to the top right corner of the page, where you’ll find your profile image. Click on it, then select “Manage Account.” On the sidebar, locate and click on “API Keys.” Subsequently, initiate the creation of a new secret key by selecting the respective button.

Make sure to copy the generated secret key and store it securely, as it will be essential for connecting your application with the OpenAI API in the subsequent steps.

Having safeguarded the key, proceed to create a Node.js project and set up an Express server atop it. Begin with the installation process and the foundational configuration to kickstart your journey.

To initiate the creation of an AI chatbot without skipping any crucial steps, follow these instructions to sign up for the ChatGPT API:

  1. Visit the OpenAI website by navigating to Openai.
  2. Initiate the registration process by clicking the “Sign up” button.
  3. Provide your name, email address, and select a password as part of the registration details.
  4. Accept the terms and conditions before clicking the “Create Account” or a similar button to proceed.
  5. Verify your email address by following the instructions sent to the email you specified during registration.
  6. Once the email is verified, log in to your OpenAI account using your credentials.
  7. Access the OpenAI API documentation and API reference to gather the necessary information for your chatbot development journey.

Acquiring Credentials and API Keys for Integration

In the realm of API integration, credentials and keys play a pivotal role by authenticating and authorizing access to the ChatGPT API. Here’s a breakdown of their significance:

Secret Key The secret key serves as confidential information crucial for authenticating your API requests. Its primary function is to verify your identity, ensuring secure and reliable communication between your application and the API. Additionally, OpenAI employs the secret key for managing API usage, enabling efficient billing and usage tracking.

Embark on your ChatGPT journey by generating API keys. Simply click the “Create new secret key” button and follow the provided steps.

Access Tokens Access tokens, generated by the ChatGPT API, are short-lived and provide temporary authorization to access the API. Issued post-successful authentication using your secret key, these tokens contribute to enhanced security and control in your chatbot integration.

Critical Considerations Before Building an AI Chatbot

Before embarking on the development of your AI chatbot, it’s crucial to take the following key factors into consideration to ensure a successful solution:

  1. Define Purpose and Value: Clearly outline the chatbot’s purpose, specific goals, and the value it brings to users. Understand how it aligns with your overall objectives.
  2. Understand Target Audience: Gain deep insights into the needs, preferences, and communication style of your target audience. Consider demographics, language proficiency, and other factors influencing chatbot design.
  3. Select Interaction Platform: Determine the platform and channels for user interaction, whether it’s a website, mobile app, messaging platforms (e.g., Facebook Messenger, Slack), or voice assistants (e.g., Amazon Alexa, Google Assistant). Assess capabilities, user base, and integration possibilities.
  4. Design Intuitive Conversations: Create a well-structured and intuitive conversation flow that guides users seamlessly. Anticipate user needs, plan the user journey, and provide clear instructions for engaging interactions.
  5. Prepare Relevant Data: Gather and prepare necessary data, ensuring accuracy, relevance, and currency. Data is essential for training and enhancing the chatbot’s capabilities.
  6. Plan for Integration: If interaction with existing systems, chatbot frameworks, APIs, or databases is required, plan for seamless integration. Identify necessary connections and ensure data retrieval and updates are smooth.
  7. Prioritize Privacy and Security: Implement robust privacy and security measures to protect user data and comply with regulations. Incorporate secure data handling practices, encryption methods, and user authentication mechanisms.
  8. Iterative Development Approach: Adopt an iterative development approach, releasing and testing the chatbot in stages. Gather user feedback, enhance data training, and refine the chatbot based on user experiences and suggestions.
  9. Ethical Considerations: Ensure the chatbot adheres to ethical guidelines, promoting fair and unbiased interactions. Address any ethical concerns related to data usage or decision-making.
  10. Scalability Planning: Plan for scalability to handle increasing user loads without compromising performance. Consider factors like response times, concurrent user capacity, and resource requirements in your scalability strategy.

How do you define Gradio?

Gradio is a Python open-source library designed to simplify the creation of customizable, user-friendly UI components for machine learning models, APIs, or any arbitrary functions with just a few lines of code. It streamlines the process of interacting with your models in a web browser by allowing you to drag and drop elements like images, text, or even voice recordings and instantly observe the live output in an interactive format. You can seamlessly integrate the GUI directly into your Python notebook or share the generated link with anyone.

This library is particularly useful for building online GUIs with minimal code, making it convenient for showcasing model performance. Gradio is fast, easy to set up, and ready to use, providing a shareable public link that enables remote access for parallel model execution on your machine. Gradio supports various types of media, including text, images, video, and audio. Beyond machine learning models, it can be employed for embedding regular Python code as well.

Applications of Gradio:

  1. Demonstrations for Stakeholders: Generate interactive demos of your machine learning code, providing a valuable tool for clients, users, or team members to better understand and engage with your models.
  2. Interactive Model Debugging: Utilize Gradio during the development phase to interactively debug your machine learning models, facilitating a streamlined debugging process.
  3. User Feedback Integration: Incorporate Gradio into your workflow to gather feedback on model performance directly from users. This enables efficient model improvement iterations, fostering a quicker and more responsive development cycle.

Building Own Software Environment for AI Chatbot Development

Build Own AI Chatbot With ChatGPT API

Travel Animator Journey Route
Exploring the Ultimate Travel Animator Journey Route 103

Before diving into the creation of an AI chatbot fueled by ChatGPT, ensure your environment is equipped with essential tools. To streamline the setup, you’ll need Python, Pip, OpenAI, and Gradio libraries, an OpenAI API key, and a code editor such as Notepad++. While this may appear daunting initially, rest assured that the steps are straightforward and accessible to anyone. Follow the simple steps outlined below:

Install Python

  1. Begin by installing Python on your computer. Visit the provided link and download the setup file compatible with your platform.
  2. Execute the setup file, ensuring to check the option for “Add Python.exe to PATH.” This step is crucial. Subsequently, click “Install Now” and proceed with the standard installation steps for Python.Verify the Successful Installation of Python
  3. To confirm the proper installation of Python, open Terminal on your computer. If you’re using Windows, you can use Windows Terminal or Command Prompt. Once in the terminal, execute the following command. The output will display the Python version. For Linux or other platforms, you might need to use python3 --version instead of python --version.
python --version

Upgrade Pip

Simultaneously installed with Python, Pip serves as the package manager for Python. This section outlines the process of upgrading Pip to the latest version, crucial for installing various Python libraries, including OpenAI and Gradio.

  1. Launch the Terminal on your PC; in my case, I’m using the Windows Terminal. Run the following command to update Pip. On Linux or other platforms, you might need to use python3 and pip3 instead of python and pip.
python -m pip install -U pip
Executing this command ensures that Pip is up-to-date, facilitating the installation of necessary Python libraries.

Install OpenAI and Gradio Libraries

1. Let’s proceed to install the OpenAI library, enabling interaction with ChatGPT through its API. In the Terminal, execute the following command to install the OpenAI library using Pip. If the command encounters issues, attempt running it with pip3.

pip install openai

This command ensures the installation of the OpenAI library, a crucial step for connecting to ChatGPT via the API.

2. Following the completion of the OpenAI library installation, let’s proceed to install Gradio. Gradio serves as a valuable tool for swiftly developing a user-friendly web interface, facilitating the demonstration of your AI chatbot. Moreover, it provides a seamless option for sharing your chatbot online via a shareable link.

pip install gradio

By executing this command, you ensure the installation of Gradio, enhancing your ability to create an interactive and shareable web interface for your AI chatbot.

Download a Code Editor

To edit the code effectively, you’ll need a code editor. For Windows users, Notepad++ is recommended (Download). Simply download and install the program using the provided link. Alternatively, if you prefer robust integrated development environments (IDEs), consider using VS Code, which is compatible with any platform.

On macOS and Linux, you can opt for Sublime Text (Download) as an alternative code editor. For ChromeOS users, the Caret app (Download) is an excellent choice for code editing.

With the code editor in place, you’re almost done setting up the software environment. The next step involves obtaining the OpenAI API key.

Testing the Chatbot

Testing is a pivotal phase in the chatbot development process, serving various essential purposes:

  1. Functionality and Correctness: Verify that the chatbot aligns with specified requirements and functionalities. Testing is instrumental in identifying and rectifying bugs, errors, logic flaws, or any unexpected behaviors in the code.
  2. Accuracy of Responses: Chatbot testing helps pinpoint instances where the system provides incorrect or misleading information. This phase allows for model refinement or adjustments to enhance the accuracy of text generation.
  3. User Experience (UX): By simulating real-world interactions and scenarios, testing enables the evaluation of the chatbot’s usability, language understanding, and overall user satisfaction. This feedback loop is critical for continual improvement in the user experience.
  4. Performance and Scalability: Simulate scenarios with a high volume of user requests or concurrent conversations to assess how the chatbot performs under varying loads. This step is crucial for ensuring optimal performance and scalability in real-world usage scenarios.

Build Your Custom AI Chatbot with ChatGPT API and Gradio

Now comes the exciting phase of deploying your AI chatbot. In this tutorial, we harness the power of OpenAI’s latest “gpt-3.5-turbo” model, the force behind GPT-3.5. Notably more potent than Davinci, this model has been trained up to September 2021, offering enhanced cost-effectiveness, responsiveness, and the ability to retain conversation context.

For the user interface, we leverage Gradio to fashion a straightforward web interface accessible both locally and on the web.

1. Launch your chosen code editor (e.g., Notepad++) and insert the following code. Courtesy of armrrs on GitHub, I’ve adapted the code and incorporated the Gradio interface.

import openai
import gradio as gr

openai.api_key = "Your API key"

messages = [
    {"role": "system", "content": "You are a helpful and kind AI Assistant."},
]

def chatbot(input):
    if input:
        messages.append({"role": "user", "content": input})
        chat = openai.ChatCompletion.create(
            model="gpt-3.5-turbo", messages=messages
        )
        reply = chat.choices[0].message.content
        messages.append({"role": "assistant", "content": reply})
        return reply

inputs = gr.inputs.Textbox(lines=7, label="Chat with AI")
outputs = gr.outputs.Textbox(label="Reply")

gr.Interface(fn=chatbot, inputs=inputs, outputs=outputs, title="AI Chatbot",
             description="Ask anything you want",
             theme="compact").launch(share=True)

Remember to replace ‘your-api-key’ with the actual API key you obtained earlier. This code sets up an interface that allows users to input messages, generating AI-driven responses through the ChatGPT API.

2. Here’s how the code appears in the code editor. Ensure to replace the placeholder text “Your API key” with the actual API key you generated earlier. This is the only modification required.

3. Proceed to the top menu, click on “File,” and select “Save As…” from the drop-down menu.

4. Set the file name as “app.py” and change “Save as type” to “All types” in the drop-down menu. Save the file to an easily accessible location, such as the Desktop. Feel free to customize the name, but ensure it ends with .py.

5. Navigate to the location where you saved the file (app.py). Right-click on it and choose “Copy as path.”

6. Open the Terminal and execute the following command. Type ‘python,’ add a space, paste the path (right-click to paste quickly), and press Enter. Keep in mind that the file path will differ on your computer. Also, on Linux systems, you may need to use ‘python3.’

HiFace Face Shape Detection and Hairstyle App
Find Hair Styles Best HiFace Face Shape Detection and Hairstyle App 100
python "C:\Users\raju\Desktop\app.py"

This command initiates the execution of your AI chatbot program.

7. While you might encounter a few warnings, you can safely ignore them. Look at the bottom for both a local and public URL. Copy the local URL and paste it into your web browser.

8. Congratulations! You’ve successfully built your ChatGPT-powered AI chatbot. It’s live and ready to answer any questions you throw at it. Now, you have the flexibility to use your chatbot instead of relying on the official website or other ChatGPT alternatives.

9. Additionally, you can copy the public URL and share it with friends and family. Keep in mind that the link remains active for 72 hours, but your computer must remain powered on since the server instance is running locally.

10. To halt the server, navigate to the Terminal and press “Ctrl + C.” If that doesn’t work, press “Ctrl + C” again.

11. For restarting the AI chatbot server, simply copy the file path again and run the command as in step #6. Note that the local URL remains the same, but the public URL changes with each server restart.

python "C:\Users\raju\Desktop\app.py"

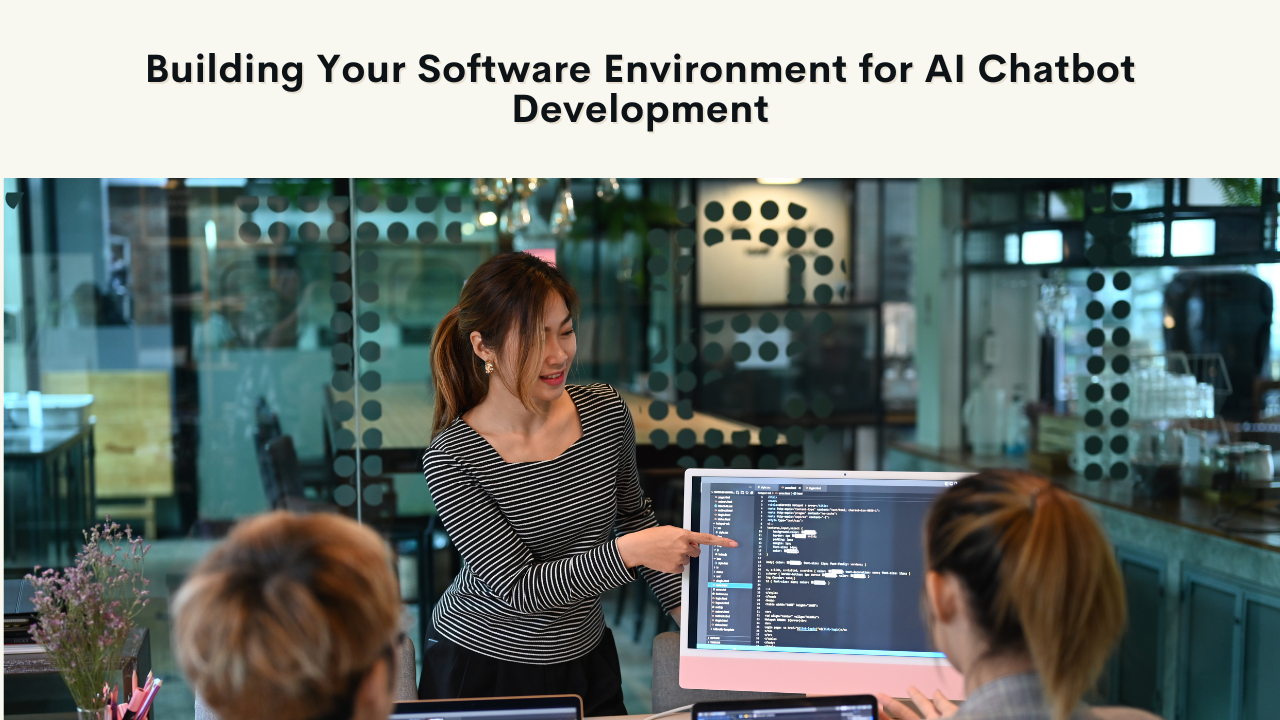
Create Your Customized ChatGPT API-Powered Chatbot

One of the unique features of the “gpt-3.5-turbo” model is its capability to assume specific roles tailored to your preferences. You have the creative freedom to make your AI chatbot funny, angry, or an expert in various domains such as food, tech, or health. A simple modification in the code is all it takes to personalize your chatbot. Here’s a step-by-step guide:

1. Right-click on the “app.py” file and select “Edit with Notepad++.”

2. In the code, focus on making changes to this specific section. Provide the relevant information to the AI to define its role. Save the file by pressing “Ctrl + S.”

messages = [
    {"role": "system", "content": "You are an AI specialized in Food. Do not answer anything other than food-related queries."},
]

For instance, I’ve crafted a Food AI, and the process involves customizing the code to impart a specific role to your chatbot.

3. Launch the Terminal and execute the “app.py” file as you did previously. Once again, note the local and public URL provided. Copy the local URL. If a server is already running, press “Ctrl + C” to stop it. Subsequently, restart the server. Remember, after each modification to the “app.py” file, you need to restart the server for the changes to take effect.

python "C:\Users\raju\Desktop\app.py"

4. Access the personalized AI chatbot by opening the local URL in your web browser. Now, you have a customized chatbot designed specifically to respond to food-related queries. This demonstrates how versatile the approach is – you can create a Doctor AI, an AI with Shakespearean flair, or even one that communicates in Morse code. The possibilities are virtually limitless.

This concludes the process of building your AI chatbot with ChatGPT 3.5. Furthermore, you can tailor the “gpt-3.5-turbo” model to assume roles of your choosing. With AI, the potential for creativity knows no bounds. If you’re interested in exploring how to use ChatGPT on Android and iOS, check out our linked article. To discover the myriad possibilities with ChatGPT, delve into our curated article. If you encounter any challenges, feel free to share them in the comment section below, and we’ll do our best to assist you.

Conclusion

The process of creating an AI chatbot using the ChatGPT API proves to be remarkably straightforward, requiring just a few lines of code. Leveraging the extensive data and natural language processing capabilities embedded in GPT-3.5, constructing a chatbot that engages in meaningful conversations has never been more accessible.

By following the guidelines outlined in this article, individuals of varying technical backgrounds can craft their own functional bots, adept at comprehending and responding to user queries. The potential applications for these bots are virtually boundless, spanning roles from customer service agents to virtual assistants. The ChatGPT API serves as an ideal entry point for those venturing into the realm of AI chatbot development, boasting user-friendly features and impressive capabilities. Given its ease of use and notable functionalities, it comes as no surprise that an increasing number of individuals are embracing this technology for diverse applications today!

FAQ’S for Build Own AI Chatbot With ChatGPT API

1. What is ChatGPT API, and how can I build my AI chatbot using it?

Answer: ChatGPT API is an interface provided by OpenAI that allows developers to integrate ChatGPT into their applications. You can create a personalized AI chatbot using the ChatGPT API by following a step-by-step guide, which involves obtaining API keys, setting up a software environment, and utilizing Gradio for a user-friendly interface.

2. What is Gradio, and how does it contribute to AI chatbot development?

Answer: Gradio is an open-source Python library that simplifies the creation of customizable UI components for machine learning models, APIs, or any arbitrary functions. It facilitates the development of interactive interfaces for AI chatbots, enabling easy demonstrations, user feedback, and interactive debugging during the development process.

3. What are the key considerations before constructing an AI chatbot?

Answer: Before building an AI chatbot, it's essential to define its purpose, understand the target audience, choose interaction platforms, design a structured conversation flow, gather relevant data, plan for integration, consider privacy and security, adhere to ethical guidelines, adopt an iterative development approach, and ensure scalability for optimal performance.

4. Why is testing crucial in the chatbot development process?

Answer: Testing is vital to verify functionality and correctness, ensuring the chatbot aligns with requirements and identifying and fixing bugs. It helps enhance the accuracy of responses, evaluate the user experience through real-world simulations, and assess the chatbot's performance and scalability under different loads.

5. What are the reasons to personalize roles in the "gpt-3.5-turbo" model when creating an AI chatbot?

Answer: Personalizing roles in the "gpt-3.5-turbo" model allows you to tailor your AI chatbot to specific roles, such as making it funny, angry, or a specialist in a particular domain. This customization adds a unique touch to the chatbot's responses and opens up diverse possibilities for creating specialized chatbots for different purposes or user interactions.


1 thought on “How to Build Own AI Chatbot With ChatGPT API in Easy 2024”

Leave a comment